Wednesday 31 December 2008

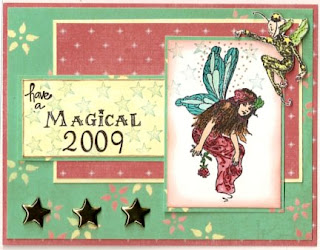
Have a Magical 2009

December 31, 2008

HAPPY NEW YEAR TO YOU ALL!

First of all I would like to wish you all a Happy New Year. In some parts of the world they have already started celebrating the New Year and still in other parts the celebration is about to begin. I look forward to this new year and hope you all will have a fantastic one.

Here is a card made for today's sketch challenge.Used stamps from the Fairies stamp set of Crafty Secrets Clear Art Stamps. The Fairy was stamped on white cs with Tuxedo Black Memento ink and then colored with various Copic markers. Added some glitter to the wings and some Fairy dust with a Gold gel pen.

Regards,
Marisa

Stamps: Fairies and Adore - Crafty Secrets Clear Art Stamps
Ink: Tuxedo Black Memento ink, Pink Grapefruit and various Copic markers
Paper: Pompeii and Bright-n-Sunny from Dream Street Papers
Accessories: Star brads

Tuesday 30 December 2008

Thinking of You

December 30, 2008

Ooooooh, only one more day left to the end of the year and the beginning of 2009. I cannot believe how fast this year has gone by. It has been a good year and I hope you all had a great year as well. Looking forward to what 2009 has in store for me.

Here is a card made for today's Color Challenge - So Saffron, Bravo Burgundy, Handsome Hunter.

Azalea image was stamped 2x on white cs with Onyx Black Versafine and colored with Tombow markers. Second stamped image was cut out, curved on the edges and popped up on the main image panel. Main panel was die cut with the Labels 2 nesty and matted onto Burgandy then saffron colored cs that was also die cut with the Labels 2 nesty. This was then mounted onto the bg DP Meadow Trim from Heidi Grace, then onto to Burgandy cs. Applied some sponging of Burgandy and Saffron to the different layers of the card.

Used the same Labels 2 nesty to make my tag and just trimmed the edges with a scalloped punch. Added some brads from BasicGrey on the 2 edges of the tag.Also added some glitter to the Azalea and edges of the panels.

Stamp: Azalea from Rubber Stampede
Ink: Onyx Black Versafine, various Tombow markers and Glitter pen
Paper: Meadow Trim - Heidi Grace, Burgandy, white and Saffrom cs
Accessories: Brad and Labels 2 Nestability

Saturday 27 December 2008

You Make Me Smile

December 27, 2008

I am on a roll after a long time not posting. Had to stay home today as I was afraid to get stuck in the snow/slush/mud/ice. Yes that is what we have outside. So many cars in my neighborhood are getting stuck and people are spending hours just trying to dig around their cars to try to get it out from the mess. I was going to do some shopping, but quickly changed my mind when I saw just how many cars are stuck out there. So instead, I decided to try and play catch up with my stamping and the challenges.

Here is a card for the Holiday Challenge Extravaganza 2008 over at Splitcoast Stampers. For this challenge we were to get inspiration from a photo taken by Christine Lebrasseur - "I wish...".

For this card I stamped the branch from Basic Grey onto a marbled cs with Dark Brown Color Box Ink. I then used white liquid applique on the branch and sprinkled it with white glitter. I let it dry for a bit and then applied some heat with a heat gun to puff up the liquid applique. The cs stock was then die cut using the Labels 2 nesty from Spellbinders, embossed it and then sponged it with Purely Pomegranate. Stamped the different butteryflies onto white cs with Purely Pomegranate, then colored them with Copic markers. Each of the butterflies were cut and glued on to the main panel. The main panel was mounted onto Purely Pomegranate cs then onto to the background dp from 'The Sasha Paper Collection' by Prima Marketing. Sentiment is from the $stamps of Michaels which was stamped on another die cut piece from the Labels2. Added a butterfly ribbon at the bottom and then some Prima flowers.

Stamps: Autum Leaves and $ Stamps from Michaels
Paper: The Sasha Paper Collection - Prima Marketing and marbled and Purely Pomegranate cs
Ink: Purely Pomegranate and various Copic Markers
Accessories: Butterfly ribbon, Prima Flowers, brad and Labels 2 nesty

From ou Home to Yours

December 27, 2008

I hope that everyone had a very wonderful Christmas Day celebrating with Family and Friends. Over here in BC, Canada, we got a white Christmas. It was so beautiful just watching the snow fall and see everything white all over the place.

For today, I have made a card to wish you all a Happy New Year "From our Home to Yours". This card was also made for the Inspiration Challenge over at Splitcoast stampers.

Inspiration of this challenge was taken from - Mackenzie-Childs. Here is the picture I drew inspiration from http://www.mackenzie-childs.com/product.aspx?orgid=16&floor=14&dept=16&col=0&id=814&keywords=/Fur14/All16/&page=1&vao=0. The inspiration is entitled - Kitchen in a Cupboard Scenery Armoire. I didn't have a stamp of a Cupboard and instead I used a Window Scenery for this challenge.

Scenery stamp is from the Home Sweet Home stamp set of Crafty Secrets Clear Art Stamps which was just released this December. Image was stamped with Tuxedo Black Memento Ink and colored with various copic markers. Image of the window was stamped with Deep Brown Color Box and cut out with scissores. Filled in the white parts with Brick Beige copic markers and highlighted some portions with a glitter pen. Cut the opening of the window and glue some acetate at the back and then placed the scenery behind the acetate. The window piece was then mounted onto a beige cs that was die cut with the Labels 2 nestabilities from Spellbinders. The edges of the label was sponged with Walnut Stain Distress Ink. This was then mounted onto the background paper from the Classic Paper Designs from Crafty Secrets. Added some brads to the bg paper and the lace border punched cs to the edges.
Stamps: Home Sweet Home - Crafty Secrets Clear Art Stamps and Window Stamp - All Night Media
Paper: Classic Paper Designs - Crafty Secrets and beige and brown cs
Ink: Tuxedo Black Memento Ink, Walnut Stain, Dark Brown and various Copic markers
Accesories: Brads and Lace Border punch, Labels 2 Nestabilities

Sunday 21 December 2008

Holiday Greetings!

December 21, 2008

More cards for the Holidays.

Here is a card for today's Splitcoast Featured Stamper challengeToday's featured stamper is Paula Tracy. If you check out her gallery she has lots of beautiful cards. Here is the card I selected from her gallery.

Stamped image is from the Friendly Kritters stamp set of Cornish Heritage Farms. Image was stamped with Tuxedo Black Memento Ink and then colored with Tombow and Copic markers. Used a white Signo pen to add the snowflakes. DP is from Daisy D's collection. Instead of the stiching, I added some dots around the matting.Holiday Greeting to all of you.

Thursday 18 December 2008

Home Sweet Home

December 18, 2008

Sandy from Crafty Secrets is releasing a new stamp set today called Home Sweet Home. Check out the Heartwarming Vintage Blog for more details and some great give-a-way news. She will also be posting some of the projects the design team have made using this stamp set.

Here are a few cards I made using this sweet new stamp set.

The first one is called Home Sweet Home. Image was stamped on white cs with Tuxedo Black Memento Ink and colored with copic markers. Cut the image with a scissor and mounted it onto cream and blue scalloped circles. Placed a strip of cream and blue cs below this, then a retangular piece of the same cs, then onto the background DP from the Classic Paper Design collection of Crafty Secrets. Added pearls to the corners of the card which were colored in blue using a copic marker.
The second card is 'The road to a frinds' house is never too long". The image was again stamped on white cs with Tuxedo Black Memento Ink and colored with copic markers. Added some glitter on the pond with a Sakura glitter pen. Cut the image with scissors and them mounted it on to a square scalloped blue cs that was outlined with a metallic blue sakura pen. Background DP is from The Pastel Paper Desings collection of Crafty Secrets. Used a MS scalloped border punch on the pink DP. Sentiment was stamp on the pink DP and added some Prima flowers, punch ferns and half pearl to the 2 ends of the sentiment. Card based was outline with a blue metallic pen and then dotted all around.

The third card is an ATC. Image was stamped onto white cs and colored with copic markers. Just love these markers. Coloring comes out so even. Cut out a blue cs to the size of an ATC card and distress it with Faded Jeans and Walnut stain distress ink. I also sponged some metellic blue ink on the background to give is some shine. Stamped the sentiment to the bottom on the ATC. Stamped the key image with Sky Blue Pearlescent Brilliance ink and Faded Jeans and cut it out with scissors and a scalpel. This was mounted on top of the ATC with double sided foam tape. Added 3 half pearls to the right of the image which I colored with a blue copic marker.

Hope you all are excited for the coming Holidays. I wish you all a Very Happy Christmas and Joyful New Years.


Marisa

Tuesday 2 December 2008

Santa Joy

December 2, 2008

So for today, I am killing 3 birds with 1 stone and combining 3 challenges. First of all today's color challenge to use Sahara Sand, Very Vanilla and Basic Black, the Tuesday Crafty Secret Forum challenge to add buttons to you hearts delight, and the Christmas Spirit Challenge over at Noel Mignon with Michele Kovaks sketch.

The Santa image from the Vintage Christmas stamp set of Crafty Secrets Clear Art stamps was stamped on Very Vanilla cs with Onyx Black Versafine. Then cut with a scalloped circle Nestability and embossed. The edges of the scallop circle was distressed by sponging Sahara Sand all around the edges. This was matted onto black, Sahara Sand then black cs. Background very vanilla cs was stamped randomly with the star from the Chirstmas Joy stamp set of Crafty Secrets with Sahara Sand then mounted onto the black cs base. Another piece of very vanilla cs was stamped again with the star and distressed on the edges with Sahara Sand. Underneath this layer is a black layer that was punch with a Martha Stewart lace border punch. Added black ribbon on the center, circle metal pieces (JOY) and 2 buttons to the top corners.

Stamps: Christmas Joy and Vintage Christmas Crafty Secrets Clear Art Stamps
Ink: Onyx Black Versafine and Sahara Sand
Paper: Very Vanilla, Sahara Sand and Black cs
Accessories: Circle Scallop Nestability, ribbon, metal letters, button and lace border punch

Monday 1 December 2008

Christmas Design Team Challenge

December 1, 2008


Wow, can you believe that it is already December. Soon Christmas will be here, all the kids will be excited to see what presents will be under the tree on Christmas morning.

I cannot believe that it has been a while since I last posted anything on this blog or at Splitcoast Stampers. I have been really busy at work. 4 co-workers have retired on Friday and all week long I was busy making them some mini albums to take with them so they have something to remember all the years that they have worked with us. It was a sad day to say good bye to the 4 of them on Friday. I am glad it is over and we all can move on.

For today's post, our Team leader, Vicki Chrisman has challenged us to use any of the Christmas stamps... images.. or both for a card, a layout, an altered project.. anything. For this challenge I made 4 items.

The first is a Christmas Countdown Calendar. I used a 12x12 piece of chipboard for the frame on my project. I trimmed down the chipboard to 12x10 and then cut it at 5, 6, 7 inch intervals. I layed all 4 pieces beside one another leaving a gap of about 1/8". I then covered both side with DP paper from Basic Grey. The front portion of the frame was covered with Basic Grey's Wassail and the back portion which is not visible was covered with a DP from Basic Grey's Figgy Pudding. I used some cardstock strips from Bazzill to the top portion of the frame. Then proceeded to use a bind-it-all to punch out the holes for the binding. This was done on the 2 ends of the frame. This was put aside for awhile. Cut out 13 (1-3/4x4") strips of DP also from the Wassail collection of Basic Grey. Stamped the Christmas Ornament from the Christmas Joy stamp set of Crafty Secrets. Stamped the numbers using A Sexy Little No. stamp set, colored the ornament holder with a gold mettalic Sakura pen and added a little glimmer on the bottom portion of the ornament with a glitter Sakura pen. Used the bind-it-all to the top portion of the 13 strps of paper and then proceeded to bind the 2 ends of the frame together with the strips of paper to make a tent. Stamped the work CHRISTMAS downwards on a strip of green cs using the TopHat - ABC stamp set and COUNTDOWN across on another piece of green cs. The 2 strips were placed towards the left and underneath the numbered strips. For the right side of my Christmas Countdown tent I placed another piece of the Wassail DP. Stamped the Holly leaf stamp in a circular pattern to form a wreath. Before stamping the next holly leaves, I would mask the last one stamped. Colored the leaves and holly berries with Tombow markers and cut the DP using a circle Coluzzle. Cut 2 different sizes of scalloped circles with the Red DP also from the Wassail collection using Spellbinders scallop circle nestabilities. Matted the wreath to the scalloped circles and then onto to the background DP. Stamped DAYS in the middle of the wreath with some letters in the Favorite Fellas stamp set and then added 4 green half-pearls from Kaiser to the 4 corners.

Stamp: Christmas Joy, A sexy Little No., Tophat - ABC and Favorite Fellas stamp set from Crafty Secrets Clear Art Stamps.
Paper: Wassail and Figgy Pudding from Basic Grey and green cs
Ink: Onyx Black Versafine, Mettalic Gold Sakura pen, Glittle Sakura pen and various Tombow markers.
Accessories: Green half-pearls, circle coluzzle, scallop circle nestabilities and Bind-it-all

For the 2nd, 3rd and 4th projects I made some Christmas Candles. I stamped some images from the Christmas Joy stamp set onto white tissue paper with Onyx Black Versafine. I colored the images with Tombow markers and then cut the tissue paper either with a scallop circle nestability or scissors. I placed the tissue paper images on vanilla candles and then placed wax paper on top of the tissue. Used a craft iron to melt the candle wax and tissue together. I have always admired candles decorated this way and always thought that it would be too completed to make. Realized after making 3 of these, that it was really quite simple. Now my kids want to make some of their own to give away for Christmas.

Stamps: Christmas Joy
Ink: Onyx Black Versafine and various Tombow markers
Paper: White tissue paper
Accessories: Candle


Check out the blogs of the other Design Team Members to see other projects for this challege.
Thursday 20 November 2008

Season's Greetings

November 20, 2008

Here is a card for today's Ways to Use it challenge over at Splitcoast Stampersto, use pearls.

Image (A Snowman's Best Friend - Whipper Snapper Designs, Inc) was stmped on white cs with Tuxedo Black Memento ink. It was then colored with various copic markers. cs was cut with the Cricut Machine using the Storybook cartridge. Aqua mat was also cut using the Cricut machine. Layers were mounted onto the DP background from the Snowy Days Snowflakes paper of pebblesinc the onto to the aqua base of the card. Outlined the borders with dashes using a Signo pen. Punched some snoflakes and trimed it a bit to fit on the four corners of the aqua mat layer. Then topped it of with pearls that were colored with an Aqua copic marker. Sentiment was stamped with Tuxedo Black and is from creative cafe.

Stamp: A Sowman's Best Friend - Whipper Snapper Desings, Inc
Ink: Tuxedo Black Memento ink, Aqua and Copic markers
Paper: Snowy Days Snowflakes - Pebblesinc
Accessories: Half pearls, Storybook - Cricut and snowflake punch

Wednesday 19 November 2008

naughty or nice

November 19, 2008

Here is a card for today's sketch challenge at Splitcoast Stampers.

Image is from the Christmas Critters stamp set of Penny Black. It was stamped on white cs with Tuxedo Black Memento and colored with Copic markers. Did a little stippling with Lime Pastel to blend in with the background paper. Images was matted on to red then green cs. Outlined the edges of the layers with Gold Mettalic Gel pens. Dp is from the Falala collection of makingmemorries. On each of the 4 corner squares I punch part of the design from the BG paper with a circle punch and then coated it with Glossy Accents. Sentiment is a rub-on from Cosmo Cricket and final touch to the card are 2 red crystals on each side of the sentiment.

Stamp: Christmas Critters
Paper: Falala, green, red and white cs
Ink: Tuxedo Black Memento, copic markers, Gold Mettalic Gel pen and Lime Pastel
Accessories: red bling, Glossy accents, and circle punch

Tuesday 18 November 2008

Thanks so much!

November 18, 2008


Today is Tuesday and Tuesday is the Color Challenge over at Splitcoast Stampers and it is also the day for the Tuesday Crafty Secret Forum challenge. So I combined both challenges and made one card.


Color challenge was to use Real Red, Basic Black and Kraft and the Crafty Secret Forum challenge's theme was 'thanks'.


Card was made with stamps from the Glamour Girls Crafty Secrets Clear Art set which was stamped on white cs with Tuxedo Black Memento ink. Then colored with Copic markers. Hat and ribbon on the image was topic with a Sakura glitter pen. Sentiment was stamped on kraft cs and sponged with Creamy Caramel on the edges. White, black and red cs was but with an oval scallop nestabilities and dotted with a white Signo pen. Background DP is from the Radiant Paper Design collection of Crafty Secrets.


Stamp: Glamour Girls
Paper: Radiant Paper Design, white, black, red and kraft cs
Ink: Tuxedo Black Memento ink, Black, Coral, Carmine, Raw Silk and Sand copic markers
Accessories: Oval Scallop Nestabilities from Spellbinders

Monday 17 November 2008

Merry Christmas Medallion

November 17, 2008

Today's Technique Lover's Challenge over at Splitcoast Gallery was to make something using a triangle fold medallion.

So for this challenge, I once more used a stamp from the Christmas Joy stamp set of Crafty Secrets Clear Art stamps. The stamps in this set are so adorable and there is so much you can do with them.

First of all, I cut 8 - 2" squares and folded them, following Lynn's instructions in the challenge which you can find here. I assembled the triangle medallion and put it aside for a while. I then stamped the little Christmas bird on DP from the Wassail Paper Pad of Basic Grey (all the paper used for this card is from this paper pad) with Tuxedo Black Memento ink. I heat set the stamped image to prepare it for coloring with Copic markers. Then proceeded to color the image with several copic markers. I added some gold metallic Sakura to the edge of the circle. Then die cut a round scallop with green dp using my small nestability. I used 2 other sizes of scallop circles for the other 2 layers behind the main image. The main image was mounted on to the triangle fold medallion, then onto the other 2 circle scallops. Edges of the circle scallops were again lined with the gold metallic Sakura pen. The whole circle piece was then mounted onto the background DP. Stamped the Merry Christmas and cut the piece out with scissors and mounted it onto to red DP. Cut the 4 corners from a Cuttlebug corner die and placed them on the four corners of the card.

Stamp: Christmas Joy Crafty Secrets Clear Art Stamps
Paper: Wassail Paper Pad from Basic Grey
Ink: Tuxedo Black Memento, Walnut Stain, Copic markers and Gold metallic Sakura pen
Accessories: Cuttlebug corner die

Sunday 16 November 2008

Kreative Blogger Award

November 16, 2008

My friend Darlene honored with this award. She is such a sweet lady. She herself, has received 2 of this awards and is very deserving of it.

Here are the instructions on this award:

1. The winner may put the logo on their blog.
2. Put a link to the person who sent you the award.
3. Nominate 5 blogs.
4. Put links to their blogs.
5. Leave a message for your nominees

I will be updating this post later on to list my five nominees deserving of this award.

Once again, thank you so much Darlene.

Marisa

Update:

Here are the blogs I am nominating for this award:

Go check their blogs out and you will find lots of inspirations.

Marisa

Saturday 15 November 2008

November 15, 2008

This card was made for the Featured Stampers challenge over at Splitcoast Stampers. Congratulation Kendra for being selected for the featured stamper. You have a great gallery. Here is the card I selected from Kendra's gallery for this challenge.

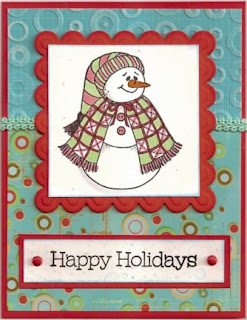
Snowman image was stamped on white cs with Tuxedo Black Memento ink. Colored with copic markers and sponged the edges with Aqua Color Box ink. Cut red square scallop with Spellbinders nestability. Aqua strip of cs on the top was embossed with a cuttlebug embossing folder and then sanded. Botton DP is Holiday Joy Mini Dots from Paper Adventures. Wrapped ribbon on the edge were the 2 papers met. Sentiment is from Stampin Up which was stamped with Tuxedo Black onto white cs that was sponged on the edges with Aqua Color Box and then mounted on red cs. Added some red brads to both ends of the sentiment strip.

Stamp: Snowman stamp from Great Impressions and Sentiment from Stampn Up
Paper: Holiday Joy Mini Dots from Paper Adventures, white and aqua cs
Ink: Tuxedo Black Memento, Aqua Color Box and Copic markers
Accessories: Ribbon and brad

Wednesday 12 November 2008

JOY

November 12, 2008

Wow, what a busy weekend. First of all I had my sister come to visit. It's been almost a year since she last came over to visit. We really had a good time together. Saturday, I helped out with the make-n-takes at the Crafty Secret booth in the BC's Creative Expo. This was my first time doing something like this and I thoroughly enjoyed myself. Then, I was lucky enough to get a spot in the Copic Certification Class. Learned a lot on how to use these great markers.

With all that behind, I now had time to make a card for 2 challenges. Today's card was made for the Tuesday Challenge over at the Crafty Secret Forum. For this challenge the host Darlene, challenge us to use punches. This card was also made for today's sketch challenge at Splitcoast Stampers.

Christmas Ornament from the Christmas Joy collection of Crafty Secrets Clear Art Stamps was stamps onto DP from Basic Grey's Wassail paper pad with Pitch Black Adirondack ink. Edges were distressed slightly with Walnut Stain Distress ink and then parts of the ornaments were inked with a Gold Sakura Glitter pen. Bird image was stamped onto white cs with and colored with Copic markers. Both images were cut with scissors. Bird was mounted onto the ornament with doublesided foam tape. Ornament was mounted onto another DP from the Wassail paper pad, which was punched and embossed on the corners with a Fiskars corner punch. Used a snowflake punch to cut the 3 snowflakes which were colore with a Gold Glitter pen and mounted onto the 3 squares. Stamped the sentiment JOY onto DP with Walnut Stain and cut it into squares which were mounted on top of the snowflakes. Rest of the layers are DP from the same Wassail paper pad. Added some dots with a Signo Pen.

Stamp: Christmas Joy Crafty Secrets Clear Art Stamps
Ink: Pitch Black Adirondack, Walnut Stain Distress Ink and various Copic markers
Paper: Wassail paper pad from Basic Grey, white cs
Accessories: Fiskars corner punch and Snowflake punch

Friday 7 November 2008

A Very Happy Christmas

November 7, 2008

Here is a card for today's Ways to Use It Challenge to use a corner punch in your creation.

This card was made using stamps for the recent release of Crafty Secrets - Christmas Joy.The wreath was made using the single Holly Leaf stamp and stamped around a circle with Onyx Black Versafine and colored with red and 2 shades of green Tombow markers. Then stamped the ribbon from the same set, colored it with red Tombow marker and cut the shape out. This was added to the bottom of the wreath. Cut the cs into a circle and matted it on to a red scallop circle. This was then matted to the three square layers. Two of with were punched at the corner with a ticket punch. Used DP from Heidi Grace for the background and added ribbon and sentiment to the bottom of the card.

Stamp: Christmas Joy Crafty Secrets Clear Art Stamps
Paper: Jolly and Bright, white, red and green cs
Ink: Onyx Black Versafine and Tombow markers
Accessories: ribbon, brad, chipboard and circle scallop nestability

Monday 3 November 2008

Falala

November 3, 2008

It's time for another Crafty Secret Card. This time using one of the latest stamps released by Crafty Secrets Clear Arts stamps.

For today's card I used stamped images from the Christmas Joy stamp set. This card was also made for today's Try a new Technique challenge over at Splitcoast Stampers which was to make a Decorative Circle Medallion. A technique used by yesterday's featured stamper - Becca. She has complete video tutorials in her blog.

First of all, I followed the instructions from Becca's tutorial for the circle medallion. I cut a circle using a colluzle 2x. First on plain photo copy paper and then on white cs. The circle I cut on the photo copy paper was folded into 8 pie sections and this was used to mark lines on the back side of the cs circle. Once the lines were there to guide my punching, I used one of the corner adorner punches and lined up the center of my punch to the guide line. I punch 8 times around the circle. If you do it right the middle should just fall off once you finished the 8th punch. If it doesn't, just trim the little part that is still attached using a blade. I then smudged Versamark on the front of the medallion and poured some Silver Embossing Tinsel and heat embossed the medallion. Put that aside for awhile. I then stamped the 2 singing bird images with Onyx Black Versafine and colored it with some Copic markers. Cut the cs in a circle to the same size as the medallion. I dotted the circle with a Quickie Glue pen and then poured a small amount of silver glitter to form some snow. Below the 2 birds, I also drew randomly lines with the glue pen and poured some clear sparkle glitter and white fun flock also for a snow effect. I cut some acetate in the same size circle and glue this to the front of the white cs then glue the circle medallion on to this. Used a circle scallop nestability to cut the base of the circle medallion. Background paper is the reverse DP from Bo-Bunny- Holiday magic Dot. Used the front of the DP for the white scallops on the top of the card. Final touch to the card is a green ribbon. Tutorial for making the ribbon can also be found on Becca's blog. In fact you can learn a lot of techniques from her blog.

Stamps: Christmas Joy Crafty Secrets Clear Art Stamps
Paper: Holiday Magic Dot-BoBunny, white cs and green shinny cs
Ink: Onyx Black Versafine and copic markers
Accessories: Silver embossing tinsel, silver glitter, corner punch, circle scallop nestability and ribbon.

Thursday 30 October 2008

Merry Christmas

Octobeer 30, 2008

Here is a card made for the Ways to Use It Technique over at Splitcoast Stampers. Today technique is to use cracking in project.

For this card I used the Vintage Stamp Set from Crafty Secrets Clear Art Stamps. The image was stamped on white cs with Onyx Black Versafine. Used a tiny sponged tip applicator to sponge Galaxy Gold and Moonlight White on the image. I then stippled Walnut stain around the image and then sponge the very edges of the panel with the same ink. Stamped a Holly leaves on a separate cs and colored it with green and red Tombow markers. Cut the holly leaf out and adhered it to the top of Santa. I then applied Versamark to the top of the panel and heat embossed it 3x with Clear UTEE. After the UTEE cooled down I then bent the panel to form the cracks. This was matted onto dark green DP then on to burgandy DP. Background paper from the Pastel Paper Design collection of Crafty Secrets was distressed on the edges with Walnut Stain and then I randomly stamped the flourished from the same stamp set with Lightning Black. Adhered a strip of burgandy DP and the star DP from 'tis the season collection of studio 8 paper company. Most of the layers were edged with Gold Gel Pen. Used Peel Offs for my sentiment. The whole card layer was matted on to burgandy DP.
Stamp: Vintage Christmas
Paper: Pastel Paper Design and 'tis the season collection
Ink: Onyx Black Versafine, Walnut Stain, Galaxy Gold, Moonlight White and green and red Tombow markers
Accessories: UTEE

Wednesday 29 October 2008

Hello

October 29, 2008


For today sketch challenge at Splitcoast Stampers, I used stamps from the Glamour Girl stamp set of Crefty Secrets Clear Art stamps. The stamps were just perfect for the sketch. Each of the 3 images was stamped on white cs with Onyx Black Versafine. Cut into a square then matted onto red cs. Used DP form the Radiant Paper Designs of Crafty Secrets for the background. Then stamps the corner stamp and sentiment which came from the same stamp set. Pretty simple card.


Stamps: Glamour Girls Crafty Secrets Clear Art Stamps
Paper: Radiant Paper Designs
Ink: Onyx Black Versafine

Tuesday 28 October 2008

Snow Bunnies is Here

October 28, 2008

Crafty Secrets new stamp sets (Snow Bunnies and Christmas Joy)has just arrived and are available starting today, October 28th. Here are a few cards I made using the new Snow Bunnies set.

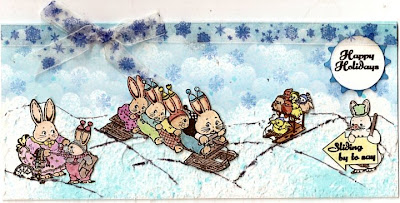
This first card was made by stamping the images on white cs with Onyx Black Versafine. Images were then colored with different colors of Copic markers and each one was cut with scissors. Used Aleene's glitter snow to make the bottom part of the snow scene and marked the hills with gray Tombow marker. Clouds were then made using a oval scalloped shape and sponge with Peacock ink pad. Mounted the images on top of the snow. Sentiment was stamped on a white round cs and the edges were slightly distressed with Peacock. Used a snowflake punch to border the sentiment by cutting the tips of the snowflake and gluing it around the circle. Then the whole scene was matted on to blue cs.

For this next card, I again stamped the image on white cs with Onyx Black Versafine and colored the images with various Tombow markers. Added some glitter underneath the image for a snow effect. Distressed the edge of the white cs by sponging with peacock ink. Cut the frame around the image with light blue cs using one of the Tri-fold card cuts found in the Joys of the Season set from Cricut. Stamped the frame with the small snowflakes from the Snow Bunnies stamp set. Matted this on white, green and blue cs. Again the white cs mat layer was sponged with peacock ink.

For the third card, I again stamped the image on white cs with Onyx Black Versafine and colored the images with Tombow markers. Used glitter on the bottom on the image for a snow effect. Cut the white cs at a diamond angle and distress the edges by sponging with peacock ink. This was then matted on a blue cs that was die cut with a square scallop nestabilities. Behind that I used the snowflake embossing folder from Cuttlebug for the white cs. Lightly passed the peacock ink pad on the raised portion of the embossed snowflakes. Sprayed it with Patina Glimmer mist. Then added white brads to the 4 corners and pierced each scallop with a piercing tool. This was then matted on to the blue and white cs.


Here is yet another card made using this set. This card was made for the Tuesday Crafty Secret Forum challenge over at Splitcoast Stampers.

Check out the Heartwarming Vintage blog for more updates and samples using this fun Snow Bunnies Stamp Set. The Christmas Joy stamp set has just arrived, so stay tuned and check often to see what project our Design Team members will create.

Sunday 26 October 2008

Magical

October 26, 2008

This weeks featured stamper over at Splitcoast Gallery is Kay (SpeedyStamper). You may want to check her gallery out. Kay is a terrific stamper.

Stamped images used for this challenge is from the Fairies stamp set of Crafty Secrets Clear Art Stamps. Images were stamped on vellumn with Walnut Stain Distress Ink. Vellumn was matted on a designer paper from the Radiant Paper Designs from Heartwarming Vintage Collection. Further mounted on beige then brown cs. Added piercing on the ends of the brown and beige cs. Then this was then glued on to another DP from Heartwarming Vintage Collection, this time from the Earthy Paper Designs. On this DP I added the star stamps which was stamped with Walnut Stain and then I distress the edges of the DP with Creamy Brown. Distressed a rectagular chipboard with creamy brown and chocolate chip inks and cut some slits on the edges to run the ribbon through. Sentiment from the Fairies stamp set was stamped with Walnut Stain. Lastly, I added 3 star brads on each side of the vellumn panel.


Stamps: Fairies Crafty Secrets Clear Art stamps
Paper: Earthy and Radiant Paper Designs and beige and brown cs
Ink: Walnuts Stain Distress Ink and Cready Brown
Accessories: Chipboard, brads and ribbon

Friday 24 October 2008

Life's Little Things

October 24, 2008

Here is a late posting for the card I made for Wednesday's sketch challenge over at Splitcoast Stampers.

Image was stamped on white cs with Onyx Black Versafine then colored with 2 shades of pink and green Tombo markers. Mounted the rectagle piece on pink them black cs. Used BasicGrey's Euphoria DP for the background panels which I matted with black, pink and then black again. Stamped the sentiment from StampinUp onto pick cs with Onyx Black Versafine. For all the black layers I added dots with a pink Souffle pen. Added a brad from BasicGrey to the corner of the sentiment panel and some holes to the top corner of the main image panel.

Stamp: Botanicals from Inkadinkadoo, Happy Harmony from Stampin Up
Paper: Euphoria from Basic Grey, black and pink cs
Ink: Onyx Black Versafine, pink and green Tombow markers
Accessories: brad from BasicGrey

Tuesday 21 October 2008

Mommy, Hold Me

October 21, 2008

Well, this week is Pink Week over at Splicoast Stampers to tie in with October's Breast Cancer Awareness Month.

Today's Color Challenge is to use Pink Pirouette (Pretty in Pink), Kiwi Kiss (Old Olive) and Chocolate Chip. Card I made today in entitled "Mommy, Hold Me". When we are happy, sad, unsure or feeling that we need someone to hold our hand and guide us through the happy and sad moments in life, there is no better person that your mom to reach out to. The flower image for this card is made with 2 stamps. I used the stem and leaves from the Flourish Flower stamp of Hero Arts and the Rose stamp from Inkadinkadoo. These were both stamped on white cs with Onyx Black Versafine. Rose was colored with 2 shades of pink Tombow markers and the leaf was colored with Old Olive ink using an aqua color brush. Cut the oval shape around the flower with an oval coluzzle and matted that on a pink oval cs then on to a chocolate chip scalloped oval cs. On each of the scallops I added some pink liquid pearls. I also distress the white oval edges by sponging with chocolate chip ink. I set this layers aside for the liquid pearls to dry out. In the meantime I cut the background layers of my card. Chocolate chip cs for the base of the card, then glue on top the pink cs from Basic Grey's Sugared, then another piece of chocolate chip cs and finally the DP of roses from the Sugared pad of Basic Grey. The edges of the lighter layers were distressed by sponging chocolate chip ink just on the very edge of the cs. I added some dots on the Chocolate chip layers with a Pink Souffle pen. And finally, used a sticker for the sentiment.


Stamps: Flourish Flower, Hero Arts and Rose from Inkadinkadoo
Paper: Sugared from Basic Grey, chocolate chip and white cs
Ink: Chocolate Chip, Onyx Black Versafine, Old Olive, Pink Souffle pen and 2 shades of Pink Tombow markers
Accessories: Pink Liquid pearls and sticker

Monday 20 October 2008

Believe in Pink

October 20, 2008

Well I decided to make another card for our Design Team Challenge -to use stamps from the Support the Girls Stamp Set and the Splitcoast Monday Technique Lovers Challenge to use watercolor pencils and Twinkling H2O.

For this card I randomly stamped on the pink DP from The Sasha Paper Collection of Prima the image of the lady with Rose Romance. I then matted the DP on black cs then gold cs. I used some Peel-Offs Outline Stickers (Daisy in Frame) on white cs and painted the flowers with pink and green watercolor pencil and used the Cherry Sorbet Twinkling H2O over the colored pencils. Each of the 4 flower frames were mounted on black cs. For the center sentiment I stamped the words from the Support the Girls stamp set on white cs and then embossed it with clear embossing powder. This was then outlined with gold sticker and mounted on black cs. Added some gold dots all around the black outer matting with gold metallic get pen.


Stamps: Support the Girls Crafty Secrets Clear Art Stamp
Ink: Black Soot, Rose Romance, Twinkling H2O, water color pencils
Paper: The Sasha Paper Collection and black and gold cs
Accessories: Outline stickers, clear embossing powder.

Our Crafty Secrets DT Challenge

October 20, 2008

In keeping up with Breast Cancer Awareness month, out design Team Leader Vicki Chrisman, has challenge us to create something with that theme in mind. We are to use the "Support the Girls" stamp set from Crafty Secrets Clear Art Stamp or the Girlfriends Images and Journal Notes or both. This stamp set was designed to help raise funds for the Susan Koman foundation for breast cancer research and Crafty Secrets is donating $1.00 for every set ordered.

For this challenge I made a card using an image for the Girlfriends Images and Journal Notes and also used the Breast Cancer Ribbon stamp from the Support the Girls stamp set. The image was mounted on to a Purely Promegranate cs. Used the Martha Stewart Lace Border punch to cut the cs mat. This was them mounted on to my BG designer paper manufactured by K&Company from the line of Brenda Walton - Chelsea Pink Flat Paper. I sprayed Glimmer Mist's Tattered Rose all over the layers of my card and sponged the edges with Purely Pomegranate and Walnut Stain to distress the paper. I also cut out some flowers from the dp and added it on to the corners of the image panel and topped it off with liquid embossing. Stamped the Breast Cancer ribbon stamp onto my dp, cut it out and added some liquid embossing. This along with some ribbon was added to the left side of the card. Used a Gold mettalic gel pen to the enges of all the layers of the card to further distress the look of the card.

Do check out the blogs of our other Design Team Members. They have created more projects using stamps or images from Crafty Secrets.

Stamps: Support the Girls Crafty Secrets Clear Art Stamps
Paper: Chelsea Pink Flat - K&Company - Brenda Walton line
Ink: Purely Promegranate and Walnut Stain
Accessories: Martha Stewart Lace punch border, ribbon, Sepia Liquid embossing

Friday 17 October 2008

Thanks

October 18, 2008

This card was made for the Saturday Inspiration Challenge. Today's inspiration comes from the Etsy Store of San Francisco's artist Joom.

Stamped images from Inkadinkado were stamped on beige cs with Vintage Sepis Versafine. Then went over the image with a clear Gel pen to give a shine. Distressed the edges of the cs with a distressing tool and then made holes all alond the side and used a brown fine liner to make faux stitching. The edges were further distress with Walnut Stain Distress ink. Main image was then mounted on to designer paper from SEI - Madera Island. Just love this paper. Stamped 'Thanks' to the bottom right of the main image.

Stamps: Inkadinkado
Paper: Medera Island - SEI and beige cs
Ink: Vintage Sepia Versafine and Walnut Stain Distress Ink

Hallowe'en Joys

October 17, 2008

With Halloween just around the corner, here is another Halloween Card Treat. For this card I used an image from the Halloween Time Heartwarming Vintage Cuts, which I matted in orange followed by black. DP behind the image is from Haunted Twilight of Reminisce. For the border and corner of the orange cs I used stamps from the Halloween Fun stamp set of Crafty Secrets. I finished off the card with some ribbon.

Stamps: Halloween Fun Crafty Secrets Clear Art Stamps
Paper: Haunted Twilight - Reminisce
Ink: Onyx Black Versafine
Accessories: ribbon

Crafty Secrets Blog Candy

October 17, 2008

Check out the Heartwarming Vintage blog, Sandy has 2 free giveaways. All you have to do is leave a comment and you could be 1 of 2 winners. Great stuff that she is giving away. And you could be one of the first to receive the 2 new sets of stamps that will soon be available. Hurry on, you have until Sundy, October 19th for this chance to be a winner.

Have a joyful weekend, everyone.

Marisa

Free Blog Candy

October 16, 2008

Check this out for a chance to win some beautiful stuff.

Wednesday 15 October 2008

Seasons Greetings

October 15, 2008

This card was made for today's sketch challenge over at Splitcoast Stampers. Stamped the poinsettias 2x with Onyx Black Versafine on white cs. Colored the image with Red Tombow marker and cut the flowers with scissors. Added some liquid embossing and set aside to dry completely. Back ground paper is from the Falala Holiday collection of makingmemories. Background DP is from Geometric Falala which was cut 4-1/8 x 5-3/8". Red matting behind this was the reverse of Poinsettia Stripe Falala DP. Used Poinsettia Stripe Falala for the bottom strip of DP across the card. Scalloped circle just in fromt of the background paper was cut with a round scallop nestabilities. Center circle is a cream cs that was cut with a circle cutter then sprayed with Meadow Green Glimmer Mist. Sentiment from the Vintage Christmas stamp set of Crafty Secrets was stamped on the cream circle by bending the clear stamp to form an arch using the circle cs as a guide. S was stamped on a separate piece of cream cs then cut and mounted with double sided foam tape. Once the liquid embossing on the poinsettia dried it was mounted on the cream center circle and added some poisettia leaves (from Holly Beery House) underneath the flowers. Center circle was then glued to the green scalloped circle. Assembled the different layers as seen.

Stamps: Holiday Calligraphies by Paper Inspirations, sentiment from Vintage Christmas by Crafty Secrets and leaves from Holly Berry House
Ink: Onyx Black Versafine and red Tombow marker
Paper: Geometric Falala, Poinsettia Stripe Falala - makingmemories and cream cs
Accessories: Liquid embossing, Meadow Green Glimmer Mist, round scallop nestabilities and circle cutter

Tuesday 14 October 2008

Penny Black Christmas Cards

October 14, 2008

Here are 2 more Christmas cards made over the last few days using stamps from Penny Black 'Christmas Critter' stamp set.

Stamped Images were colored in with Copic markers.
Stamps: Christmas Critter - Penny Black
Ink: Black Soot Distress Ink and various Copic markers
Paper: DCWV Christmas Paper pack and Holiday Joy Mini Dots from Paper Heart, red, white and aqua cs
Accessories: button, brad, Cuttlebug Embossin folder, snowflake punch and lace border punch

Christmas Card Countdown

October 14, 2008

Here are a bunch of Christmas Cards I have made over the last few days.

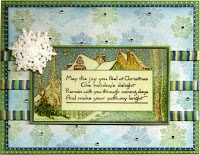
This one was made for the Tuesday Crafty Secret Forum challenge over at Splitcoast Stampers. Today's host is the ever talented Darlene. Darlene has challenged us to make our own Designer Paper using Crafty Secret stamps. Card I made uses the small and medium snowflake stamps from the Vintage Christmas stamp collection of Crafty Secrets Clear Art stamps. This was stamped randomly on a white cs with Certainly Celery, Aqua and Peacock ink. Added some bling to the center of the snowflakes. Background paper was matted onto a blue then green cs. Added some dots on the edges with a white opaque Inkssential pen. Layed 3 rows of ribbon across the card then mounted the image taken from the Christmas Images & Journal Notes pad also from Crafty Secrets. Final touch to this card was a Snowflake embellishment.
Stamp: Vintage Christmas Clear Art Stamps from Crafty Secrets
Paper: white cs and image taken from the Images and Journal Notes
Ink: Certainly Celery, Aqua and Peacock ink
Accessories: bling, ribbon and snowflake embellishment


Here are 2 cards also using images from the Christmas Images & Journal Notes from Crafty Secrets.

Monday 13 October 2008

Look Who's Turning...2

October 13, 2008

Here is a card I made for the Technique Lover's Challenge over at Splitcoast Stampers. Today's technique challenge is a Stair Step/Accordion Card.

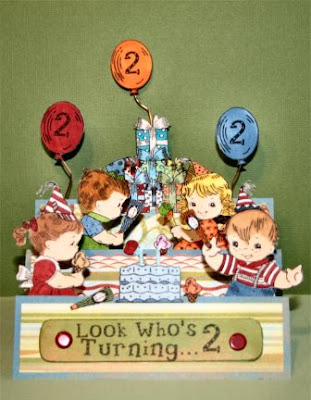
I have never tried making a card using this technique and when I saw the challenge this morning, I new that the Birthday Kids Stamp Collection from Crafty Secrets Clear Art Stamp would be the perfect stamp set to use. I stamped all the images on white cs with Black Soot Distress Ink. Then colored the images with various copic markers to match the colors on the background DP I would be using. When I finished coloring the images I cut them all up with scissors. Then I got a 10.5 x 5" white cs and scored it at 1.25, 2.5, 4.25, 6 and 8.25. Then folded the score line in an accordion fold. I cut out the blue DP from the Cupcake paper pad of Basic Grey and glued it to the various layers of the accordion fold. Then I cut different patterns from the same paper pad and glued it on top of the blue DP letting 1/8th of an inch showing. The I proceeded to glue on the different parts of my Birthday scene. I attached the balloons to a flexible wire with tape and attached it to the last layer of the accordion fold. I stamped the sentiment on the green DP again from the same paper pad, added red brads to the 2 ends and glued it on to chipboard and attached it to the first accordion fold of the card.

Wow, this really took a long time to make and it is a good thing that it is Thanksgiving Holiday here in Canada. I love the way this card turned out and the picture does not really do it justice. I still have to learn how to take pictures with my daughter's camera. That is why most of my cards are scanned and I tend to stay away from projects that require the use of the camera.

For all Canadians, Happy Thanksgiving. Hope you all are enjoy time off and spending it with Family. Just a soon as I finish with this post, I am off to making our Thanksgiving dinner.

Stamps: Birthday Kids Crafty Secrets Clear Art Stamps
Ink: Black Soot Distress Ink and various Copic markers
Paper: Cupcake from BasicGrey and white cs
Accessories: Red brads, chipboard and wire

Sunday 12 October 2008

Beauty

October 12, 2008

Here is a card for the Featured Stampers challenge over at Splicoast Stampers. Today's featured stamper is Anne Ryan. You just have to go to her gallery, Anne does amazing work and she is such a sweet Lady and leave lovely comments on your creations.

This is the card I have selected from Anne's gallery for this challenge.

For this card I stamped the collage image from Great Impressions on the back of my BG paper from Bo-Bunny's Midnight Diamonds. I colored part of the image in Burgandy with a Tombow marker to give a contrast color. Then mounted the image on burgandy then black cs. I used the main side of the DP for the background of my card. Tied a black ribbon across the top portion of the card, then mounted the stamped image to the left of the card. On the bottom right portion of the card I added some Prima flowers in deep red and pink and attached it to the card with a black brad. Added some fern leaves around the flower which I punch in black cs. Just wanted to keep the colors on this card with White, black and deep red (burgandy). The background paper was again mounted on burgandy and then the black cs base of the card.

Stamp: Great Impression
Ink: Onyx Black Versafine, and Burgandy Tombow marker
Paper: Midnight Diamonds by Bo-Bunny, black and burgandy cs
Accessories: Ribbon, Pima flowers and brad

Saturday 11 October 2008

I Love You Inspsired

October 11, 2008

Here is a card for the Inspiration Challenge over at Splitcoast Gallery. We are to get inspiration from the web site of Muzue Hirano a Japanese Artist.

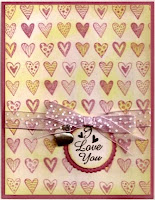
For this card I used the Stamp-a-jig to stamp the image of Nine Hearts all over the card. This was stamped with Rose Romance Pigment Ink from Stampin Up. Then I distressed the edges with Daffodil Color Box Ink and swooshed randomly across the card for the yellow coloring to the card. I also randomly selected some of the hearts and used a light yellow Tombow marker to color it in. I stamped the sentiment on a round white cs in Onyx Black Versafine and again distressed the edges with Daffodil ink and Rose Romance. This was mounted on to a rose round scallop and then glued to the bottom right side of the card. Tied a ribbon just above the sentiment and attached a silver heart to the ribbon. The panel with the stamped heart was then matted with the Rose cs base of my card.

Stamps: Nine Hearts p - A Muse Artstamps
Ink: Rose Romance, Daffodil and Onyx Black Versafine
Paper: white and rose cs
Accessories: Silver Heart, ribbon, round punch and round scallop nestabilities

Friday 10 October 2008

Curious Sleepy Kitten

October 10, 2008

Here is a card I made for the Limited Supply Challenge over at Splitcoast Stampers. Today's challenge is "Rock, Paper and Scissors". For rock I used some bling from Heidi Swapp (clear but I changed it to Blue with Manganese Blue Copic marker). Paper is Kitty Collage from Carolee's Creations. For scissors I used a scalloped edge scissor.

For the main image of the card, I stamped the image of the sleeping kitten on white cs with Walnut Stain Distress Ink. Then I colored the image with various Copic markers. Added a little glitter on the yarn with a clear Spica pen. Then I cut the image and mounted it on the tan colored cs with double sided foam. I distressed the edges of the cs with Walnut Stain. This was mounted on a blue cs. Mounted the DP also on blue cs, then light blue cs for the base of the card. Added a strip of blue cs that was cut on both sides with a scallop scissors. Added some white liquid pearls on the scallops. Then some bling to the upper left side of the centre cs.

Stamps: Sleepy Kitten - Cornish Heritage Farms
Ink: Walnut Distress Ink and various Copic markers
Paper: Kitty Collage from Carolee's Creations
Accessories: Liquid Pearls, Clear Spica pen and bling

Wednesday 8 October 2008

Christmas

October 8, 2008

Wow, Christmas is just a few months away and I have not really been concentrating on making all those Christmas Cards I will be needing this year.

For today's sketch challenge over at Splitcoast Stampers I have made a Christmas card. This card was made using stamps from the Holiday Calligraphies stamp set from Clearly Inspired by Paper Inspirations. Stamped the flowers on white cs 2x with Jet Black Impress Ink. Colored the image with Cadmium Red and New Leaf Copic markers. For the first stamped image I cut out just the flowers and glued it on top of the flowers from the second stamped image. I coated it with Clear Liquid Embossing from All Night Media and let it dry thoroughly. After it was dried, I cut all around the whole image. Stamped the sentiment on beige cs with Onyx Black Versafine ink and distressed the edges with Black Soot. Added a ribbon off to the right side and adhered the flower image with double sided foam to pop it up. This was then mounted on to Christmas designer paper, not sure who the manufacturer is. Looks like the paper is from the same place and one of them has a sticker with St. Nick 12x12 Vintage Snowflake. This was then attached to the based of my card.


Stamp: Holiday Calligraphies from Clearly Inspired by Paper Inspirations
Paper: white and black cs and Christmas DP St. Nick 12x12 Vintage Snowflake
Ink: Black Soot, Jet Black Impress ink, Onyx Black Versafine and Copic markers
Accessories: Ribbon and Clear Liquid Embossing

Tuesday 7 October 2008

Welcome to Spooksville

October 7, 2008

Cannot believe that Halloween is just around the corner. In a few weeks all those witches and goblins will be roaming around the street, knocking at our homes to beg for treats. Here is a card in keeping with the Halloween spirit, made for the Crafty Secrets challenge over in the Splitcoast forum. Every Tuesday, one of the ladies posts a challenge. Do go check it out, we have so much fun.

Today's challenge is to use chipboard in our project. Background paper for this card is from Cosmo Crickets Haunted: Them Bones, which was glued to the base of the card. Used some chipboard from the Sweet Chips - House - chipboard from Crafty Secrets. Painted the frame of the window with Apricot Copic markers and then added orange peel stickles. When the stickle dried, I cut some spider web ribbon and adhered it to the back of the window frame chipboard to make curtains. Cut out the image of the 2 pumkins from the Heeartwarming Vintage Cuts from Crafty Secrets and adhered it to the black cs background of the window. Cut out the "Welcome to Spooksville" from the same image and adhered it to the top of the window frame. This was all mounted to the background paper of the card.

Ink: Apricot Copic markers
Paper: Haunted: Them Bones from Cosmo Cricket and Halloween Time Vintage Cuts
Accessories: Orange Peel Stickles and spider web ribbon from Michaels

Sunday 5 October 2008

Congratulations

October 5, 2008

Wow, I cannot believe that I have not posted anything in a long time. I have been really busy at work that by the time I come home, I have not energy left and have not been feeling too creative.

However, I can not pass on a featured stampers challenge. Today's featured stamper over at Splitcoast gallery is Love Stampin!!!!!! Boy what a great gallery. You should check it out here. Here is the card I made for this challenge.

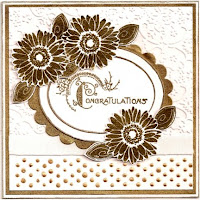
First I embossed a 5-1/4 x 5-1/4" white cs with 2 embossing folders from Cuttlebug. Set this aside for awhile. Then I stamped the 'congratulations' (from the Cherish stamp set of Crafty Secrets Clear art stamps) on white cs with versamark and heat embossed it with gold embossing powder. I also stamped and embossed the flowers and the leaves the same war. Used an oval coluzzle and cut around the sentiment. Cut a second oval one size up. Inked the edges of the ovals with a gold metallic pen. Cut an oval scalloped gold paper with an oval scallop nestabilities from Spellbinders. Glued a white ribbon between the 2 embossed designs and layered the pieces on the embossed portion. Matted this to a gold paper and then onto the white based of the card. Added gold liquid pearls to each of the dots on the swiss dots embossed portion.

Stamps: Cherish - Crafty Secrets, Garden Delight - Inkadinkado
Paper: white cs and gold paper
Ink: Versamark and gold mettalic gel pen
Accessories: white ribbon, gold embossing powder, Cuttlebug embossing forlder, gold liquid pearl

Monday 29 September 2008

Crafty Secrets DT Challenge

September 29, 2008

Vicki Chrisman our DT leader has given our DT Team another challenge this month. Challenge is for us to use the Artsy Alphabet stamp set in a project. So, for this challenge I have made 2 projects. Guess what, it is not a card.

First one is a Journal Book entitled "Journal of Hope". I bought this pink journal book at the clearance section of Michael's for $1. Not a bad deal. I immediately thought of doing something for the upcoming 'Run for the Cure' that is happening this coming weekend, October 5th. My daughter Nicole is joining her co-worker's from La Vie en Rose in an effort to raise money for this worthy cause. If any of you would like to support a participant like my daughter you can do that online here. Now back to my project. I covered the front of the pink journal with DP from the Radiant Paper Designs of Crafty Secrets. Stamped Journal of Hope with the Artsy Alphabet stamp set on a pink cs with Walnut Stain Distress Ink. Sponged the edges with the same Distress Ink. Mounted the Pink cs on Gold cs. Stamped the 'J' on a another pink cs and cut it out and distressed the edges with a distressing tool and sponged some more Walnut Stain. Cut a strip from another DP from the Radiant Paper Designs and glued it to the left side of the journal. Layered some Prima flowers and held it together with a pink brad and glued it to the left bottom portion. Added some green punch ferns to the flowers. Stamped 2x the pink ribbon from the Support the Girls stamp set(symbol for many Breast Cancer causes) on pink cs and added some clear liquid embossing and cut it out with scissors and mounted it on top of the flowers and to the top of the title. On a pink tag, stamped some more ribbons in pink and Support the Girls in Walnut stain. On another DP stamped the image of the bra, cut it out and mounted it on to the tag. Then tied a pink polka dotted ribbon to the tag. Stamped the image of the girl on white cs and on DP from Crafty Secrets. Colored the body with Skin White Copic markers and cut out the underwear from the DP and glue it onto to the white cs.

Stamp: Artsy Alphabet and Support the Girls Crafty Secrets Clear Art Stamps
Paper: DP from the Radiant Paper Designs of Crafty Secrets
Ink: Walnut Stain Distress Ink, Onyx Black Versafine and Copic markers
Accessories: Prima flowers, pink brad, clear liquid embossing, distressing tool and punch ferns

For my second project I made a picture frame. Used a picture frame from the $ section at Michael's. First of all, I painted the frame with a peachy pink acrylic paint. Let it dry. Then cut the DP from the Classic Paper Design of Crafty Secrets in an oval shape. Glued it to the frame. Outlined the edges with a gold gel pen. Stamped a small flourish border stamp from the Frame It stamp collection all along the edge of the oval frame that did not have any paper with Walnut stain Distress Ink. Added a sheer ribbon on the bottom on the frame. Stamped the Rose from the Cherish Stamp set 6x on white cs with Walnut Stain. Colored the rose with Rose Tombow marker and added clear liquid embossing. Set aside to dry. Once dry, used scissors to cut the whole rose and also the layers. Mounted the different layers on top of the ribbon and added some punch ferns. For the top of the frame, added some DP from the Classic Paper design onto a chipboard piece. Stamped the letter MOM with stamps from the Artsy Alphabet set with Walnut stain on another DP. Topped it off with clear liquid embossing and let dry. Once dry, mounted it onto the covered chipboard, added the other rose layers and finished it off with some punched ferns. I will add a picture of my mom to the frame and with update this blog once done.
Stamp: Artsy Alphabets and Cherish stamp set Crafty Secrets Clear Art Stamp
Paper: Classic Paper Designs Crafty Secrets and white cs
Ink: Walnut Stain Distress ink, Rose Tombow marker and gold gel pen
Accessories: ribbon, punched ferns and clear liquid embossing

Make sure to go check out the blogs of the rest of our talented Design Team members for more projects using the Artsy Alphabets.

Lisa- http://shabbychickjunk.blogspot.com/

Vivian- http://www.vivlyndesigns.typepad.com/

Pam - http://pamhooten.blogspot.com/

Anna- http://sweetmissdaisy.typepad.com/

Heidi- http://embellished-dreams.blogspot.com/

Vicki- http://vickichrisman.blogspot.com/