I used a mix of stamps from Crafty Secrets.
Wednesday, 28 September 2011
A Bunch of Cards
Over the past few weeks I have been making cards but didn’t have the time to take pictures. It has been a while and my editing skills have deteriorated. Sorry if the pictures are not that great.
I used a mix of stamps from Crafty Secrets.


I used a mix of stamps from Crafty Secrets.
Tuesday, 16 August 2011
2 Cards and New Stamps from Crafty Secrets
August 16, 2011
Here are 2 cards that I made over the weekend using some new stamp sets from Crafty Secrets. Sandy was so kind to send me some to play with.
The first card uses several stamps from the “Let’s Hang Out” stamp set.
This second card uses a stamp from the “Birds of Happiness” set.
Bear with me today as I am using a new method of posting to my blog using Windows Live Writer. For some reason every time I use blogger to post the pictures I download get all messed up. So I hope this works better.
Sunday, 3 July 2011
Deepest Sympathy
This card is made using a sentiment from the "Card Sentiments" stamp set of Clear Art Stamps from Crafty Secrets. DP is from Basic Grey and for frame around the sentiment is used Fancy Tags Two from Spellbinders. The bottom of the card was punch using an Anna Griffin punch.
Saturday, 23 April 2011
Happy Easter - He Is Risen
Happy Easter Holidays to all.
H ere is a card I made to wish you all a Happy Easter. Card was made using an image from the Easter Creative Scraps from Crafty Secrets. Crafty Secrets make is so easy to make cards especially is you are pressed for time with their line of Creative Scraps. Just last year Sandy started to produce the Creative Scraps double sided. There is just so many things you can do with them now.
For this card I also used designer paper from Crafty Secret Heartwarming Vintage product. Paper was take from the Classic Paper Designs. To cut the piece behind the image I used Labels 9 from Spellbinders and the Sentiment is from the Happy Easter Clear Art Stamp set from Crafty Secrets and was mounted on brown cs cut with the Fancy Tags Two which is also from Spellbinders.
Hope everyone is spending time with family on this Easter Weekend. Easter is the time to be thankful for the great sacrifice Christ did by giving up his life to save us.
Saturday, 22 January 2011
Smile
January 22, 2011
Wow, I cannot believe that the last time I posted anything on my blog was last year. Were has all the time gone.
I finally had some time to sit down and make a card which I am sharing with you today. This card is made using a new stamp set from Crafty Secret called Arts Bloom. Just check out this amazing stamp set that has 41 different images that you can build with.
The card I created uses 4 different images from this set. Images were stamped with Memento Black ink on white cs and colored with Copic markers. The big flower was stamped 3 more times and colored and cut in various places to create layers.
Sandy will be showing more samples in her blog sometime today, so hop on over to the Heartwarming Vintage blog and check all the new stuff that is coming out soon.
Have a great weekend everyone.
Monday, 15 November 2010
2 Cards for You
November 15, 2010
Here are 2 cards using new stamp sets from Crafty Secrets.
First one up is from the stamp set "Down on the Farm". This is a large stamp set with about 25 different images that you can use to make all sorts of farm scenes. Here is the Farm scene that I created using this stamp set and Copic markers.
Hope you all are having a wonderful Monday.
Here are 2 cards using new stamp sets from Crafty Secrets.
First one up is from the stamp set "Down on the Farm". This is a large stamp set with about 25 different images that you can use to make all sorts of farm scenes. Here is the Farm scene that I created using this stamp set and Copic markers.
My second card uses an image from the "Little St. Nick" set and sentiment from the "Christmas Mail' set. I used Copic markers to color in the image and then added some Polar White Flower Soft.
Saturday, 13 November 2010
Floral Art Frame
November 13, 2010
I simply love making stuff with flowers and when Sandy from Crafty Secrets sent me this "Floral Art" stamp set, I immediately new what I wanted to do with it. So here is the frame that I made using one of the 2 floral images from this small stamp set.
I stamped the images several times on white cs, then cut around the picture frame leaving some of the flower shapes to go over the inside border of the frame. The images were then colored with Copic Markers. I stamped the image 2 more times, colored and cut the individual flowers, distressed the edges of the flowers with a distressing tool and then layered it on top of the flowers on the left bottom corner of the frame. The inside and outside edges were distressed with Vintage Photo Distressing ink.
This is the close-up picture of the flowers that were cut and layered. You can see the layers and how it give dimension to the frame.
Monday, 27 September 2010
Little Blessings
September 27, 2010
Hope you all had a wonderful weekend and enjoying cooler weather. I can't believe that summer is gone and now the rain is here.
I was able to spend sometime this weekend to work on some projects using the Little Blessings Creative Scraps from Crafty Secrets. I am having so much fun with these double sided sheets.
First picture is a little wall decoration for a little girls room. The sweet image of the little girls is just one of the many images available in this sheet. I used an oval shaped scalloped frame from the Sweet Chips collection of Crafty Secrets. I colored the frame in peach using Copic markers then adhered double sided tape to the front and poured some Mica flakes. I then attached the image to the back of the frame and added another image for the sentiment, some flowers and twigs that were dipped in Flower Soft.
And here is a closer look of the image itself.
Hope you all had a wonderful weekend and enjoying cooler weather. I can't believe that summer is gone and now the rain is here.
I was able to spend sometime this weekend to work on some projects using the Little Blessings Creative Scraps from Crafty Secrets. I am having so much fun with these double sided sheets.
First picture is a little wall decoration for a little girls room. The sweet image of the little girls is just one of the many images available in this sheet. I used an oval shaped scalloped frame from the Sweet Chips collection of Crafty Secrets. I colored the frame in peach using Copic markers then adhered double sided tape to the front and poured some Mica flakes. I then attached the image to the back of the frame and added another image for the sentiment, some flowers and twigs that were dipped in Flower Soft.
This next picture is a card using another image from the Little Blessings Creative Scraps.
And here is a closer look of the image itself.
As you can see, these are such adorable images and they are so much fun to create with.
Have a great day.
Monday, 20 September 2010
"Crafty Secrets DT Challenge" - September Halloween
September 20, 2010
It's time again for another Crafty Secrets DT Challenge. For this challenge we are featuring the recent Halloween releases of Crafty Secrets. For this challenge I am featuring 2 Halloween Themed cards using The Costume Cuties Clear Art stamps. Once more Sandy has done an amazing job coming up with just the right images to create this stamp set perfect for Halloween.''
My first card is in the shape of a witches hat. I had so much fun creating this card. As you can see from the first picture below, I used the candy corn image to make the candy corn tassel at the bottom of the card. I just simply stamped the candy corn image 26 times, colored them with copic markers, cut them out, glued 2 pieces together and placed black string in between the 2 pieces. I then attached it to the bottom of the hat and added black pearls. After attaching it to the bottom I added some Liquid Embossing to give it some gloss.
If you lift the flap for the top part of the hat you have a sentiment that also comes from the same stamp set - "The Witching Hour"
And for the inside of the card I added some sentiments "Happy Halloween" and "Trick or Treat" witch also come from the same stamp set. The cute little innocent looking witch was stamped, colored with copic markers, cut and adhered with double sided foam. I also added a treat bag with some candies.
This second card is in the shape of a house. Once more I used the stamp images from "The Costume Cuties" and the "Halloween" Clear Arts Stamp sets. Once more is have the cute innocent little witch, then added the face of the moon and a witch flying on a broomstick.
When you open the door to the house you are greeted by a clown and 2 black cats.
Here is what the inside of the card looks like.
I sure hope you enjoyed these 2 cards I prepared for this special Crafty Secrets DT challenge. But that is not all, check out the projects of the rest of the DT members. I am sure that you will find more inspiration from them.
Vicki Chrisman- DT Leader
Linda Duke
Pam Hooten
Heidi Blankenship
Michelle Kovack
Melissa Phillips
Flo from France
Julie Campbell
Mary Hammer
And of coarse don't forget to also visit the Heartwarming Vintage Blog and Crafty Secrets site. Sandy always has exciting stories and new products to share as well.
Enjoy the day,
Marisa
Friday, 17 September 2010
Little Blessings
September 17, 2010
Sandy of Crafty Secrets has come out with more wonderful Creative Scraps. For today I have prepared 2 cards using 2 of the images that are included in the Little Blessings Creative Scraps. These new sheets come double sided and the size of the front image matches exactly the flip side. So if you are planning on creating any double sided projects, this is the perfect thing to use.
This first card uses a sweet image of a little girl praying and the sentiment goes this way "I'm sending you a little prayer that God will keep you in His love and care". Now how sweet is that. I cut the image in an oval and mounted it on top of a black core cs that was die cut using the Beaded Oval Nestability from Spellbinders. The die cut piece was distressed to bring out the green part of the cs. After mounting the piece together I added some Sepia Liquid Embossing and let it completely dry. Once dry, I assembled the card, added ribbon to both sides and the corners that was die cut with one of the pieces in the Lattice Pendant die set. Background designer paper is from the Classic Paper Designs from Crafty Secrets.
Now this next card uses yet another image from this same set. The image was cut and then mounted on a die cut piece using the Lacey Squares die from Spellbinders. I added some glitter using the Clear Star Sakura pen to give a little sparkle to the card. I also traced the sentiment with the Clear Star. To the right of the card I used a Martha Stewart Border punch to make the strip and added some flower brads.
On Monday the Crafty Secrets Design Team will be featuring some samples using new products that have been recently released. o don't forget to mark your calendars and come back to see what everyone has prepared for you.
Have a great weekend.
Sandy of Crafty Secrets has come out with more wonderful Creative Scraps. For today I have prepared 2 cards using 2 of the images that are included in the Little Blessings Creative Scraps. These new sheets come double sided and the size of the front image matches exactly the flip side. So if you are planning on creating any double sided projects, this is the perfect thing to use.
This first card uses a sweet image of a little girl praying and the sentiment goes this way "I'm sending you a little prayer that God will keep you in His love and care". Now how sweet is that. I cut the image in an oval and mounted it on top of a black core cs that was die cut using the Beaded Oval Nestability from Spellbinders. The die cut piece was distressed to bring out the green part of the cs. After mounting the piece together I added some Sepia Liquid Embossing and let it completely dry. Once dry, I assembled the card, added ribbon to both sides and the corners that was die cut with one of the pieces in the Lattice Pendant die set. Background designer paper is from the Classic Paper Designs from Crafty Secrets.
Now this next card uses yet another image from this same set. The image was cut and then mounted on a die cut piece using the Lacey Squares die from Spellbinders. I added some glitter using the Clear Star Sakura pen to give a little sparkle to the card. I also traced the sentiment with the Clear Star. To the right of the card I used a Martha Stewart Border punch to make the strip and added some flower brads.
Now here is a sample of one side of the Little Blessings Creative Scraps. As you can see there are so many cute images to use.
Have a great weekend.
Monday, 13 September 2010
Flower 4
September 13, 2010
Today I am featuring the last flower stamp set that was recently released by Crafty Secrets. This is the Sunflower set.
For this card, I stamped the sunflower 2x on white cs and colored it with varying shades of yellow and orange Copic markers for the flower part. The second stamped image was then cut and I left every other petal attached to the center piece. This was mounted on top of the first and I lifted the cut petals for more dimension. I also cut out the second set of leaves and place them over the first one. For the center of the Sunflower I added some brown Fun Flock to give it a fuzzy look. Take a look at the whole look of the card.
Here is a close-up of the flower part and see the dimension I achieved by raising the petals.
Keep coming back because there is still lots more Crafty Secret stuff that I will be show casing.
Sunday, 12 September 2010
Flower 3
September 12, 2010
Here is the 3rd flower I am featuring in my Flower card series. The flower image is another recent release by Crafty Secrets Clear Art Stamp called "Roses"
Image of the Rose was stamped 3 times on white cardstock and colored with Copic markers. The layers were made by cutting 2 of the different stamped images in specific places to achieve the dimension for the roses. The cut edges were slightly curved with tweezers to give the added lift to the rose. Clear Star Sakura pen was used along the creases in the rose and edges to give it the sparkle.
This the full picture of the card.
This is a close-up picture of the rose. Here you can see the dimension that was achieved by the different layers and curving the edges.
Here is the entire stamp set that also includes sentiments and a lady bug.
Tomorrow I will feature the last of the Flower series which is the Sunflower.
Have a wonderful week ahead.
Sunday, 5 September 2010
Flower 2
September 5, 2010
Here is another card using one of the new Flower stamps sets of Crafty Secrets - Dahlia. I really love this new sets that Sandy came out with. By layering the flowers you get so much dimension and it is so fun to work with.
Image was stamped 5x with Black Memento Ink and colored with copics and cut at various parts of the image to make the different layers. Edges of the petals were curled to give extra dimension.
Here is a side view close-up picture and you can just see the different layers that give this image so much dimension.
Here is what the whole set looks like.
Within the next few days I will share another card made using another of the flowers sets. There are 2 more that are just as fun to work with.
Hope you all are enjoying this Labor Day weekend.
Tuesday, 31 August 2010
Flowers
August 31, 2010
Just a quick post for today. I just want to share with you a card that I made using the Poppy Stamp set of Crafty Secrets.
Image was stamped 3x on white cs with Momento Black ink and colored with Copics. 2 of the stamped images were cut and raised on top of the original image for dimension.
You can see the layers in this photo.
Here is a closer look at the card.
This is what is included in the whole stamp set.
Monday, 23 August 2010
August New Product DT Challenge
August 23, 2010
It is time for another Crafty Secrets DT Challenge featuring a new product. For this challenge my main project is done by using the Double Sided Christmas Creative Scraps. Some time ago Crafty Secrets/Heartwarming Vintage came out with their Creative Scarps which were one sided. Sandy, owner of Crafty Secrets recently decided to re-produce these Creative Scraps and make them double sided. They are so great to use in cards, mini albums, wall hangings, ornaments and the list goes on and on. You simply can use just the front side, back side or both sides. And what is so nice about them is that when you cut the image on one side the back side has a matching image in exactly the same size.
My project for today is a Holiday Planner. We all know just how stressful it can be to get everything organized for the Holiday Season. Yes, Christmas is just 4 months away and it is time to start getting all the different lists together to make thing go by as smoothly as possible. And a Holiday Planner is one way to get things all organized.
I used the Wood Clipboard Album of Crafty Secrets for this Holiday Planner and covered the front with the back side of the Christmas Creative Scraps. I colored some of the images with chalk to make them stand out and also used some Glossy Accents on the berries. Cut out some different sizes of poinsettias using the Poinsettia die from Spellbinders, outlined the edges with a gold leaving pen and for the center of the flower used gold glass beads. For the leaves, I dry embossed them with a leaf clay mold to bring out the veins on the leaf then distressed it with a green distressing ink. The title was die cut with the labels 4 Nestabilities from Spellbinders and letters are made with Adore Clear Art stamps which is also from Crafty Secrets. Edges were distressed with Vintage Photo distressing ink.
There are 4 inner pages which are lined so that you can easily list down different list to help you get organized.
Images that are used for the different pages are from the front portion of the Christmas Creative Scraps.
Enjoy your day.
Marisa
It is time for another Crafty Secrets DT Challenge featuring a new product. For this challenge my main project is done by using the Double Sided Christmas Creative Scraps. Some time ago Crafty Secrets/Heartwarming Vintage came out with their Creative Scarps which were one sided. Sandy, owner of Crafty Secrets recently decided to re-produce these Creative Scraps and make them double sided. They are so great to use in cards, mini albums, wall hangings, ornaments and the list goes on and on. You simply can use just the front side, back side or both sides. And what is so nice about them is that when you cut the image on one side the back side has a matching image in exactly the same size.
My project for today is a Holiday Planner. We all know just how stressful it can be to get everything organized for the Holiday Season. Yes, Christmas is just 4 months away and it is time to start getting all the different lists together to make thing go by as smoothly as possible. And a Holiday Planner is one way to get things all organized.
I used the Wood Clipboard Album of Crafty Secrets for this Holiday Planner and covered the front with the back side of the Christmas Creative Scraps. I colored some of the images with chalk to make them stand out and also used some Glossy Accents on the berries. Cut out some different sizes of poinsettias using the Poinsettia die from Spellbinders, outlined the edges with a gold leaving pen and for the center of the flower used gold glass beads. For the leaves, I dry embossed them with a leaf clay mold to bring out the veins on the leaf then distressed it with a green distressing ink. The title was die cut with the labels 4 Nestabilities from Spellbinders and letters are made with Adore Clear Art stamps which is also from Crafty Secrets. Edges were distressed with Vintage Photo distressing ink.
There are 4 inner pages which are lined so that you can easily list down different list to help you get organized.
Images that are used for the different pages are from the front portion of the Christmas Creative Scraps.
Christmas Card List
Gift List
To Do List
Notes
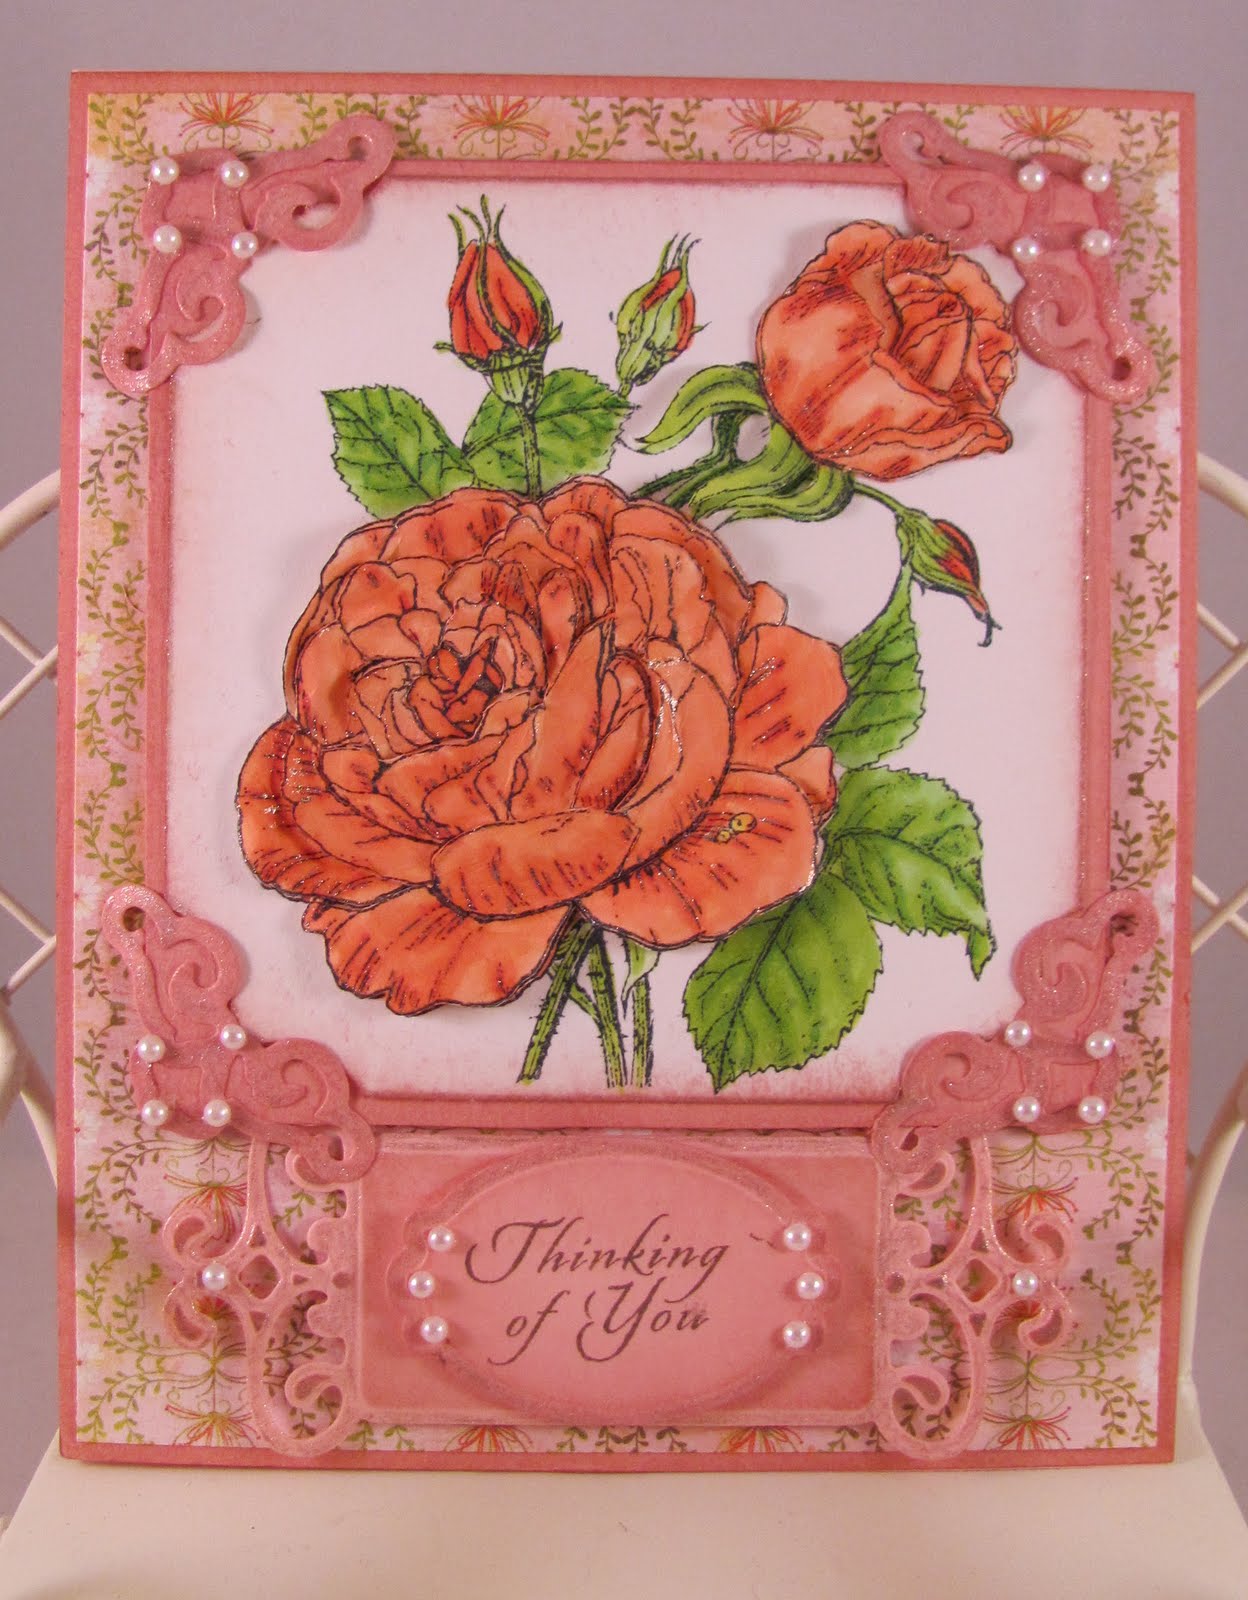
Second project for this DT Challenge is a card using a stamp from the Bathing Beauty Stamp Set. Main image was stamped on a frame from the Classic Paper Pad and colored with Copic Markers. Edges were distressed with Vintage Photo distressing ink. Second image from the same stamp set was stamped on cream colored cs and colored with Copics. To finish the card off I added some ribbon, sea shells and clear glitter on the words from the background paper "DREAM".
Through out this week keep coming back as I will feature more projects using other new products from Crafty Secrets.
For now, it is time to hop on to the rest of the Design Team Members, as I am sure they have exciting projects to share with you today.
And don't forget to check out the Heartwarming Vintage Blog and Crafty Secrets site to check up to date with the latest news and products.
Marisa
Wednesday, 4 August 2010
Glamour Girls Note Case
August 4th, 2010
Here's another project that I worked on recently. This time I am using the double side Girlfriends Creative Scraps. Sandy, owner of Crafty Secrets Heartwarming Vintage has done a great job putting double sided Creative Scraps together. Front and back images on the sheet were carefully matched so that when you cut the image in the front that you like, the back has a complimentary image in the same size. Perfect for creating hanging ornaments were you would like to showcase both front and back.
For this project, I took an inexpensive case (box) from a dollar store and covered it with the sheet using the back side of the paper. Some of the beige toned images were colored with a light colored copic marker to bring out the beauty of the image. I simply added some ribbon and pompoms to the outside edges. All around the sides I used some "Class a Peel" gold strip stickers to outline the case. When you open up the case, it holds a set of Girly Birthday Note cards. The case is perfect to give as a gift to a special friend.
This is what the front of the case looks like.

These are the 2 different side panels of the case. I just limply cut out more images from the sheet and pop it on the sides.
Here is the front again when it is open. Take a look at what is inside of the case. Some matching Birthday Note Cards. Perfect way of storing your small size cards.
And here is a picture of the 3 different styles of cards that come in the case. These were made from images found in the front part of the sheets. These images come in so handy especially when you want to make a quick vintagey yet adorable card.
Beach Time Card
August 4th, 2010
Time to show you are card made with one of the newest stamp set just recently released by Crafty Secrets called Bathing Beauties.
I used copic markers to color in the stamped image and DP is also from Crafty Secrets.
Take a look at the entire stamp set and you will be amazed at all the great vintage images you can use for cards, layouts and other crafting projects.
Subscribe to:
Comments (Atom)


